Unveiling Kombucha Leather: Your Guide to Growing & Crafting SCOBY Bio-Material
Heard whispers about 'leather' grown from tea? You are not alone. This is not science fiction. It is kombucha leather. This fascinating material offers an eco-friendly option for your projects. Makers actively explore its unique properties. Its potential as a sustainable alternative is huge.
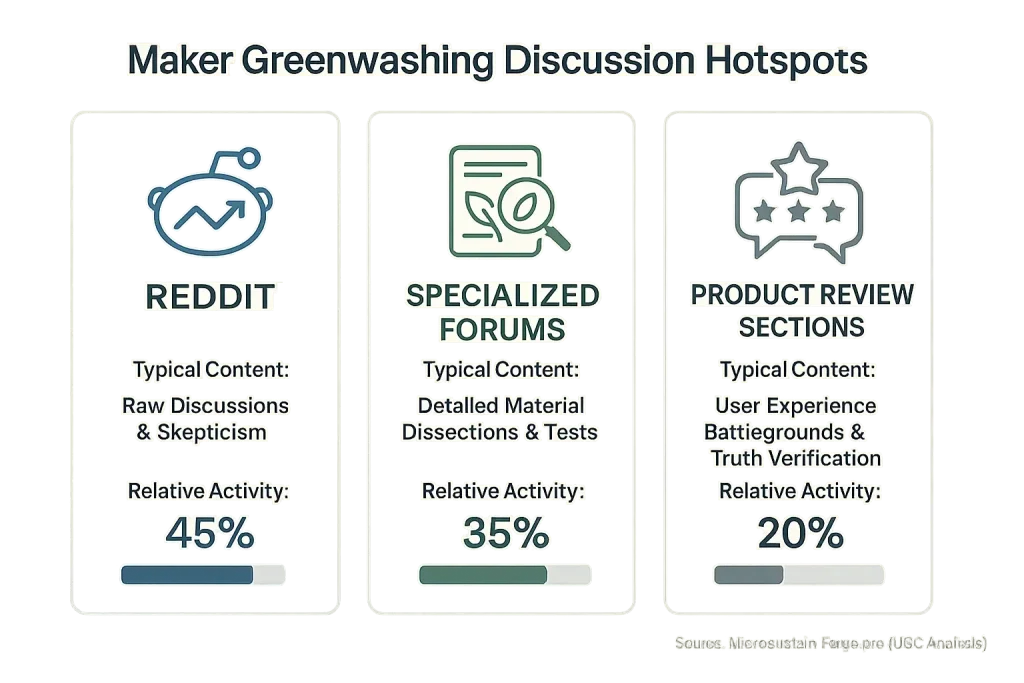
Why the buzz? Makers love SCOBY leather. Its sustainable origins are a big draw. Growing your own material offers deep satisfaction. Our deep dive into maker forums reveals this shared excitement. This home-grown alternative to traditional leather is unique. Still, makers do face common challenges learning this craft.
This guide covers growing. We detail processing. Crafting tips are included. Consider this a practical roadmap. Community wisdom forged it. We aim to demystify the process. You can avoid common pitfalls and start creating.
Growing Your Own SCOBY Leather: Step-by-Step Community-Proven Methods
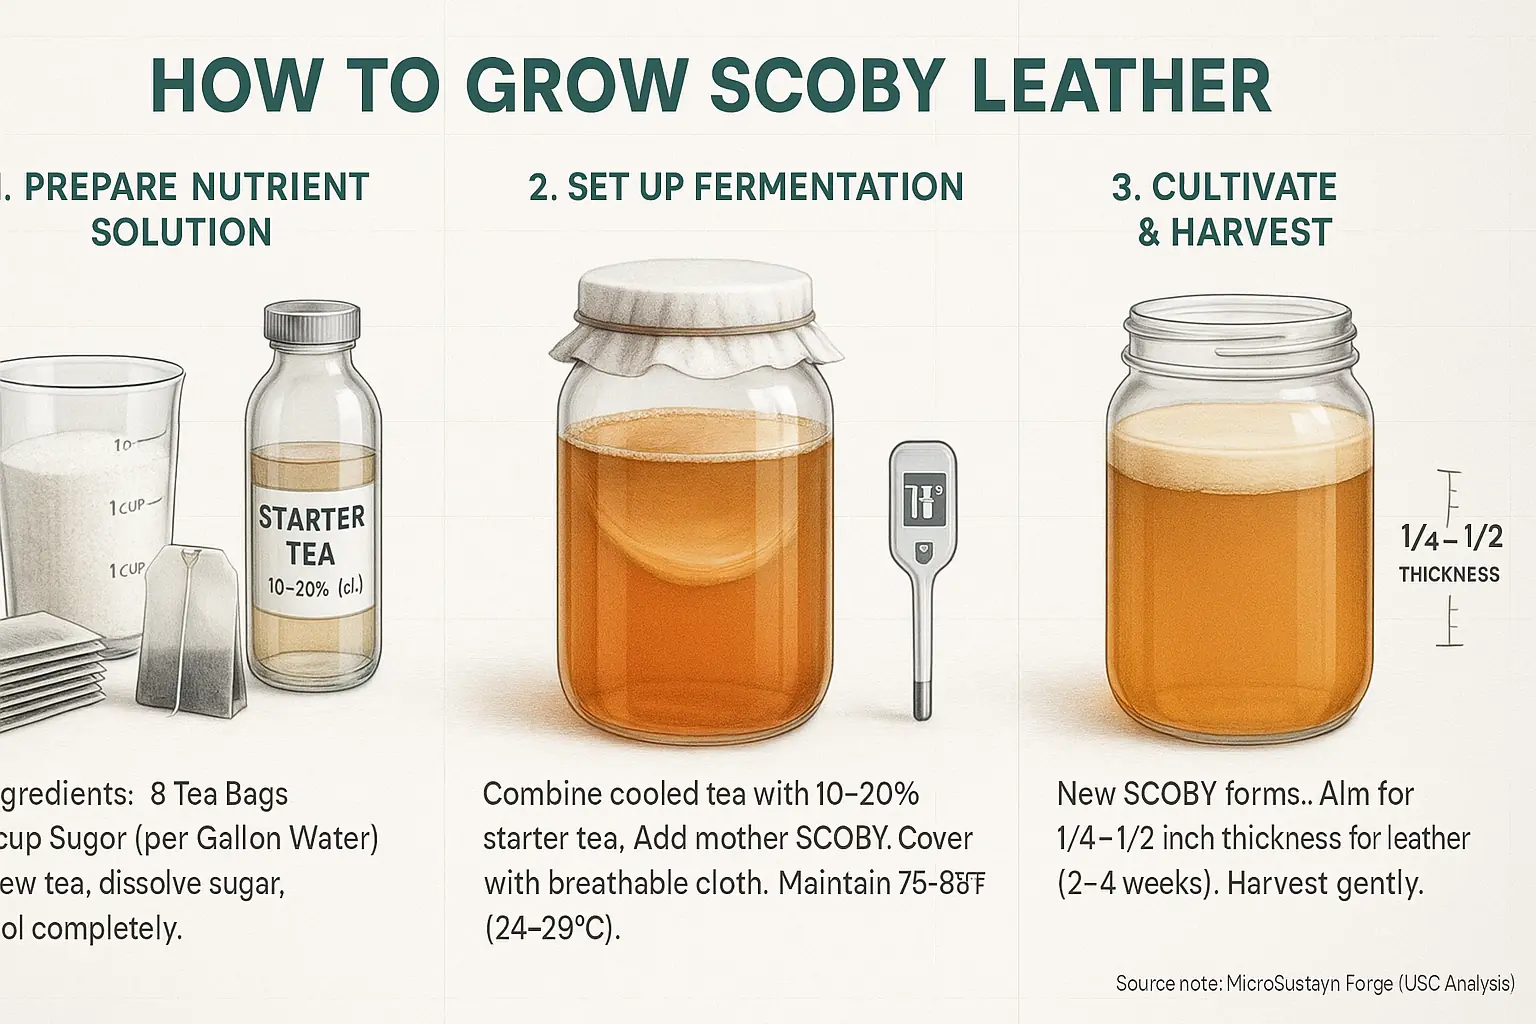
- Makers first gather essential supplies. These include black or green tea, plain white sugar, and a strong starter liquid. A previous healthy SCOBY piece accelerates growth.
- Brew strong, sweet tea. Use approximately 8 tea bags and 1 cup of sugar per gallon of water. Let this mixture cool completely to room temperature.
- Combine the cooled sweet tea and starter liquid in a wide-mouth glass or food-grade plastic container. Add your mother SCOBY if you have one. The starter liquid should be about 10-20% of your total volume.
- Cover the container opening. Use a breathable cloth like cheesecloth or a clean tea towel. Secure it with a rubber band or string. This keeps contaminants out. It allows airflow.
- Place the container in a warm, dark, undisturbed location. Ideal temperatures range from 75-85°F (24-29°C). Consistent warmth is key.
- Monitor your SCOBY growth regularly. A new layer will form on the liquid's surface. Expect this within 7 to 14 days. Leather-suitable thickness (1/4 to 1/2 inch) can take 2 to 4 weeks, sometimes longer.
- Harvest the SCOBY carefully when it reaches your desired thickness. Gently lift it from the brew. Reserve some starter tea for your next batch.
Consistent warmth dramatically influences SCOBY leather development. Many makers find temperature stability the biggest hurdle. Fluctuating temperatures often yield thin, uneven SCOBYs. One common community tip involves a simple seedling heat mat placed under the fermentation vessel. This provides gentle, constant warmth. This simple tool transformed many makers' results from flimsy pellicles to robust sheets.
Mold is a frequent concern for new SCOBY growers. Distinguishing mold from normal yeast formations is crucial. Mold typically appears as fuzzy, dry spots. These spots can be white, green, blue, or black. Healthy yeast formations are usually brown, stringy, and submerged or attached to the SCOBY. Good airflow over the brew helps prevent mold. Maintaining a low starting pH (around 4.5 or less, using enough starter tea) also deters unwanted growth. What if you see undeniable mold? The community consensus is clear: discard the entire batch. Start over. It is not worth the risk.
Patience truly is a virtue in SCOBY leather cultivation. Thicker, more durable material simply takes more time. Trying to rush the process often leads to disappointment. A healthy, growing SCOBY generally looks smooth and creamy-white to beige. It should smell pleasantly vinegary. Any off-putting, cheesy, or rotten smells might indicate a problem. Many experienced growers emphasize observing these subtle signs. They guide adjustments for future successful batches.
From Slimy SCOBY to Supple Sheet: Drying & Finishing Techniques (UGC Wisdom)
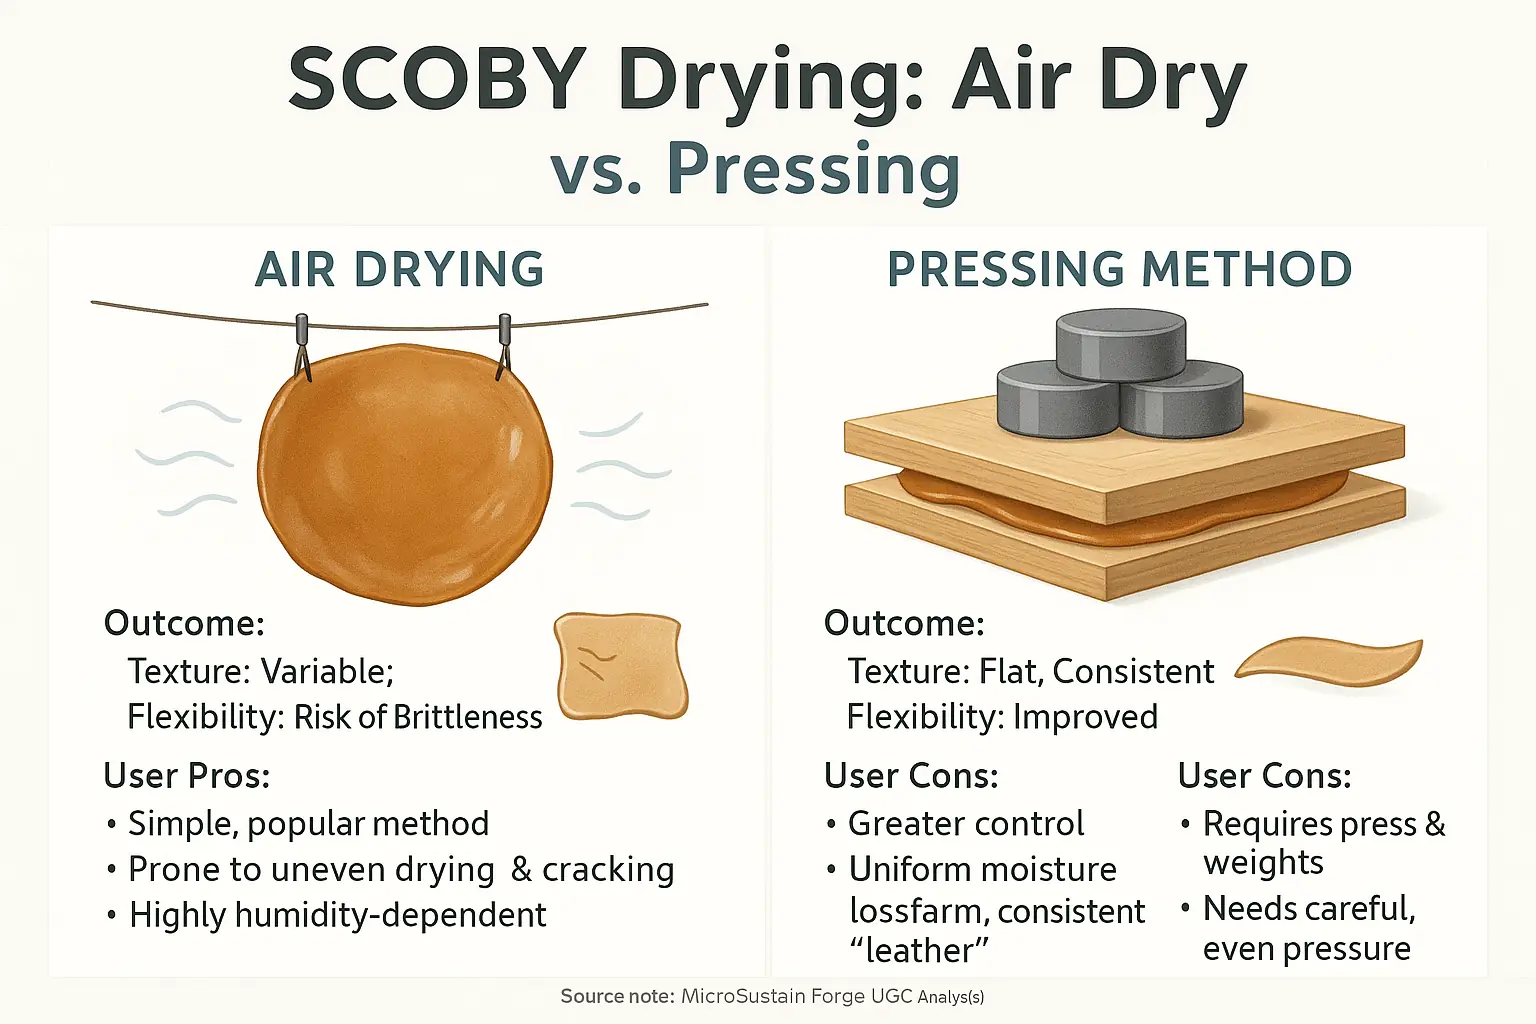
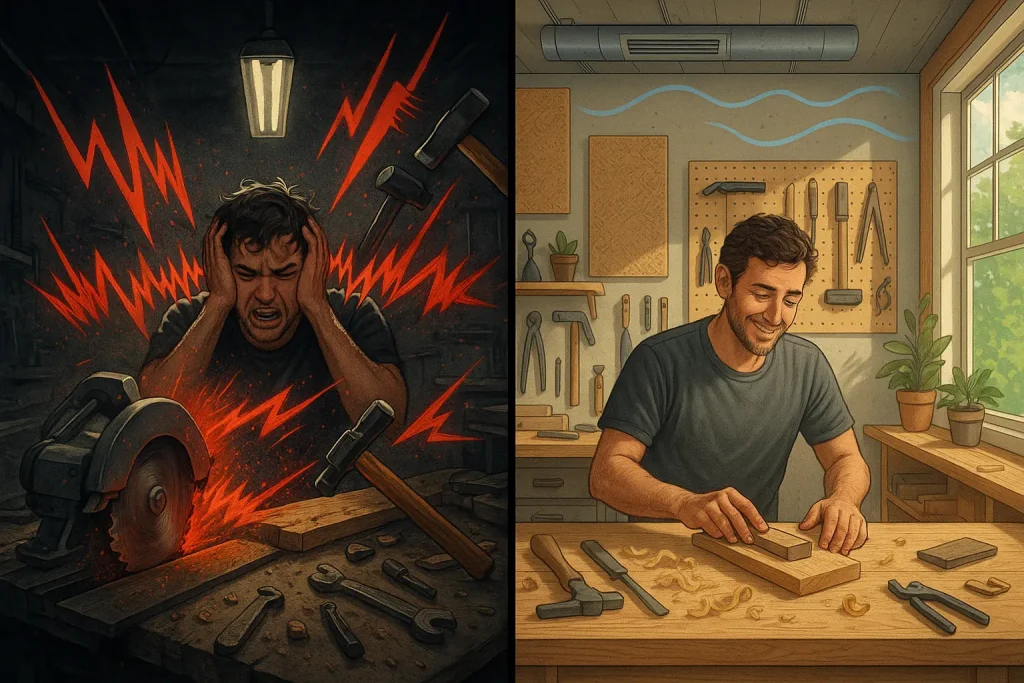
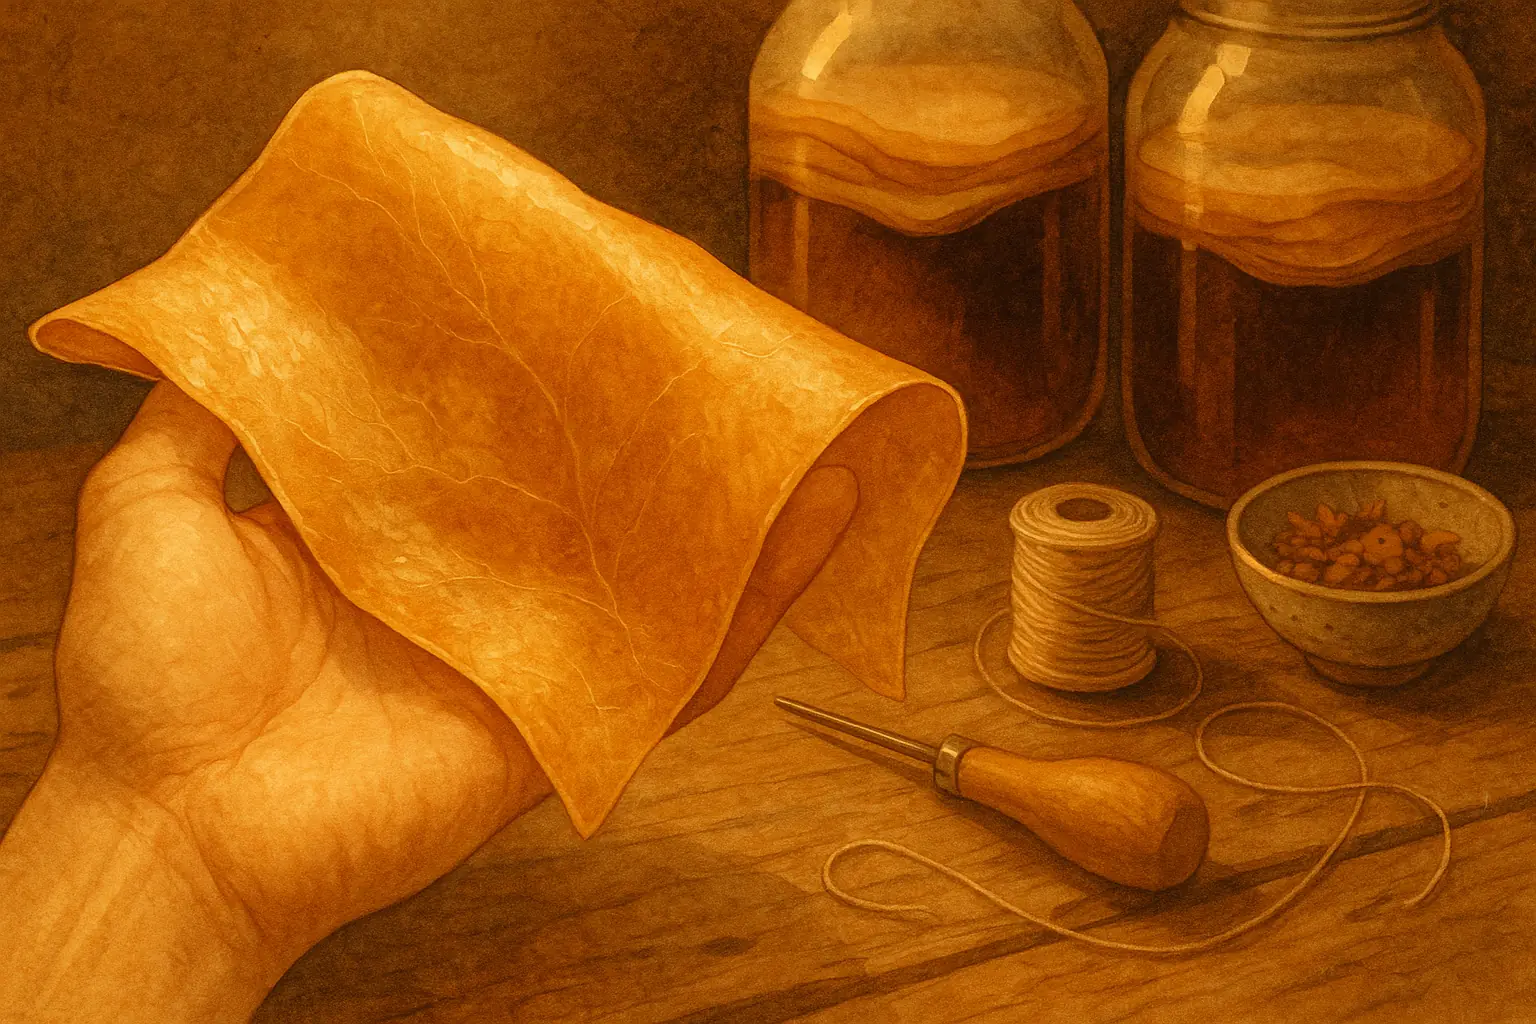
Proper SCOBY drying is crucial. It transforms that slimy pellicle. Many makers share frustrations. Brittle sheets. Cracking heartbreak. This happens from incorrect drying. The material becomes totally unusable. A common pain point, truly.
Makers explore diverse drying methods. Air drying remains popular. Pressing offers more control. Some use dehydrators for speed. Each choice heavily influences final texture. Flexibility varies significantly too. Our UGC analysis reveals humidity is a silent factor. High humidity means slow, risky drying. Too low? Rapid, uneven shrinkage. This often creates that dreaded brittleness. Experienced hands consistently use specific, even weights during pressing. This simple step ensures uniform moisture loss. The result is a flatter, more consistent leather.
Finishing unlocks SCOBY's leather potential. It creates a supple, durable material. What's a common trick? A very light rehydration. Some makers gently mist dried sheets. This restores just enough pliability before oiling. Natural oils are game-changers here. Waxes also enhance the final product. Many in the community praise coconut oil. Jojoba oil is another frequent recommendation, with users reporting it significantly improves suppleness. These treatments boost flexibility remarkably. They improve water resistance. The feel becomes noticeably softer.
Stickiness after drying? A common complaint. Uneven drying also vexes many creators. But don't lose hope. Community-driven solutions exist for these exact problems. For persistent stickiness, makers suggest a final, very light dusting. Cornstarch can work. Others find success re-pressing the sheet briefly. Use non-stick parchment paper. If your SCOBY dries unevenly, try flipping it more often. Ensure good air circulation around all sides. Patience is key. You can achieve that perfect, leather-like finish.
SCOBY Leather Process Stepper: Find Your Next Step & Get Tips
Where Are You in Your SCOBY Leather Journey?
This interactive stepper guides your unique SCOBY leather journey with precision. Makers input their current stage. The tool then delivers truly personalized advice for that exact point. These practical tips and troubleshooting steps are forged directly from our extensive analysis of maker discussions and shared project outcomes. This makes it a uniquely reliable resource.
Are you encountering a tricky problem, like inconsistent SCOBY growth or stubborn drying issues? Many makers face these hurdles. Our community data synthesis reveals that even experienced crafters sometimes hit these roadblocks. This tool offers quick, actionable solutions, drawing from thousands of real-world experiences shared across forums and project logs. Get practical answers. Fast.
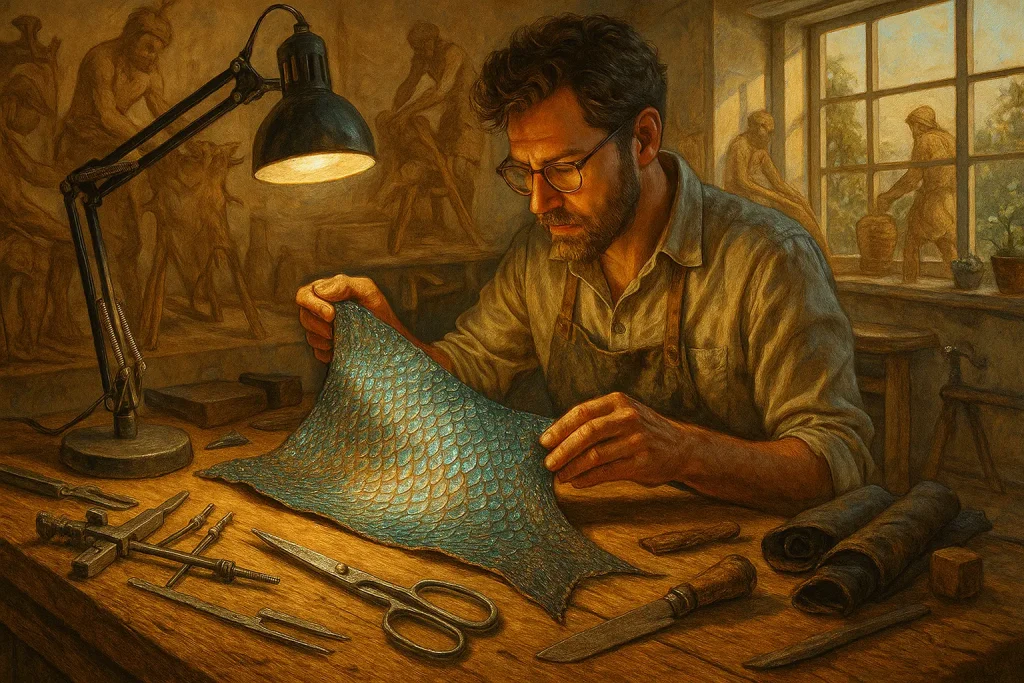
Crafting with SCOBY Leather: Inspiring Project Ideas & User Tips
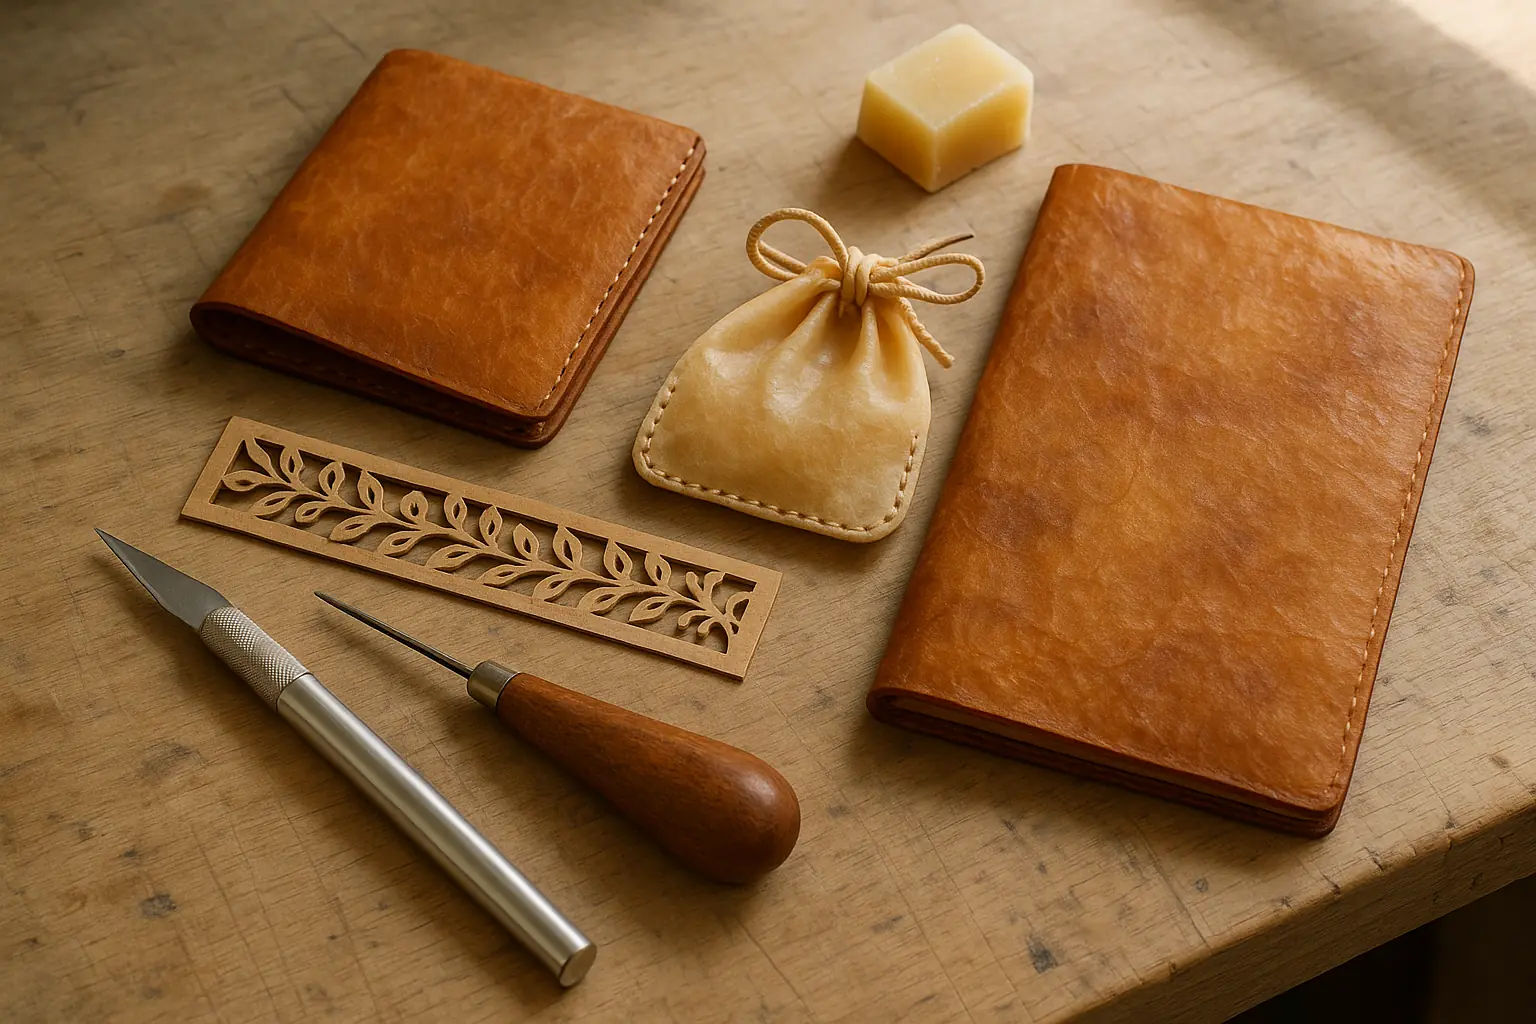
Your finished SCOBY sheets unlock exciting craft possibilities. This unique material offers surprising versatility for many projects. Makers discover its distinct, slightly translucent aesthetic. The results? Truly one-of-a-kind pieces.
Our analysis of maker discussions reveals many clever applications. Minimalist wallets are a popular starting point. For these, community wisdom suggests simple folded designs; they avoid complex seams that can stress the SCOBY. Small pouches and unique jewelry also appear frequently in user showcases. Some crafters even use thin, dried pieces for delicate earring components. Ever thought about custom book covers? SCOBY leather provides another fascinating canvas for them.
Working with SCOBY leather demands adapted techniques. Sharp tools are absolutely essential for clean cuts. A dull blade? It will tear the material. Joining pieces presents a few options. Some makers prefer flexible adhesives for smooth, low-stress seams. Others stitch for durability, but pre-punching holes is critical. This vital step prevents the needle from ripping the delicate structure during sewing. Remember, SCOBY leather is not animal leather; your usual methods might need tweaking.
Let's be real about some limitations. User experiences show SCOBY leather's water resistance varies. Untreated, it readily absorbs moisture. This is a common observation. Makers report that finishing treatments, like beeswax or certain natural oil blends, can improve this significantly. Long-term durability often depends on the project's end-use. Items facing frequent friction or high stress may show wear sooner than purely decorative pieces. So, consider these practical points when planning your next sustainable creation.
Consider this related point: algae 3D printing
Your SCOBY Leather Journey: What's Next for the Eco-Crafter?
SCOBY leather offers makers a remarkable sustainable option. You grow your own unique material. Imagine crafting items from bio-textiles you personally cultivated. This process empowers. Its full potential awaits our collective discovery.
Your continued experimentation is vital. Share your SCOBY leather journey—successes and challenges alike. MicroSustain Forge champions this collaborative knowledge building. We transform community experiences into practical, refined insights. Post your projects, share your methods; your insights fuel our forge, helping all makers pioneer this exciting frontier!