The Eco-Paint Paradox: Why Beautiful Finishes Sometimes Don't Last
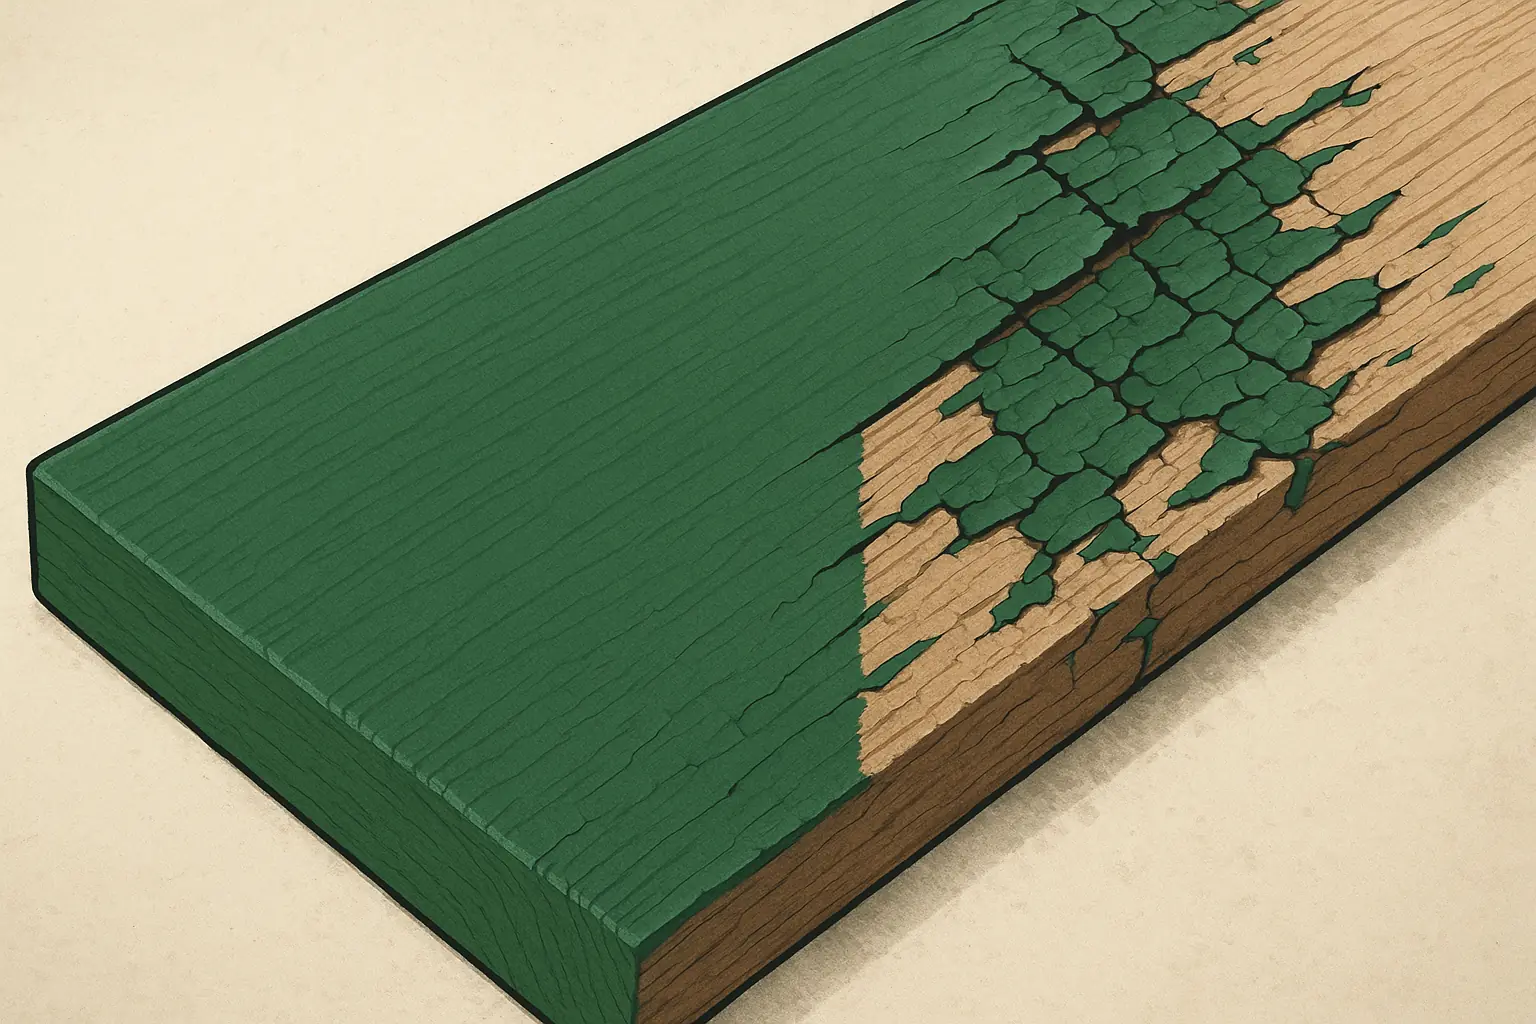
That vibrant, eco-friendly wood finish now looks sadly dull. Or worse, it has started peeling. Many wood crafters share this exact disappointment. Natural finishes and low-VOC paints offer sustainability benefits. Makers choose them for healthier workshops. Yet, their longevity sometimes falls short of expectations. These eco-paints possess unique properties, often leading to this durability paradox if misunderstood.
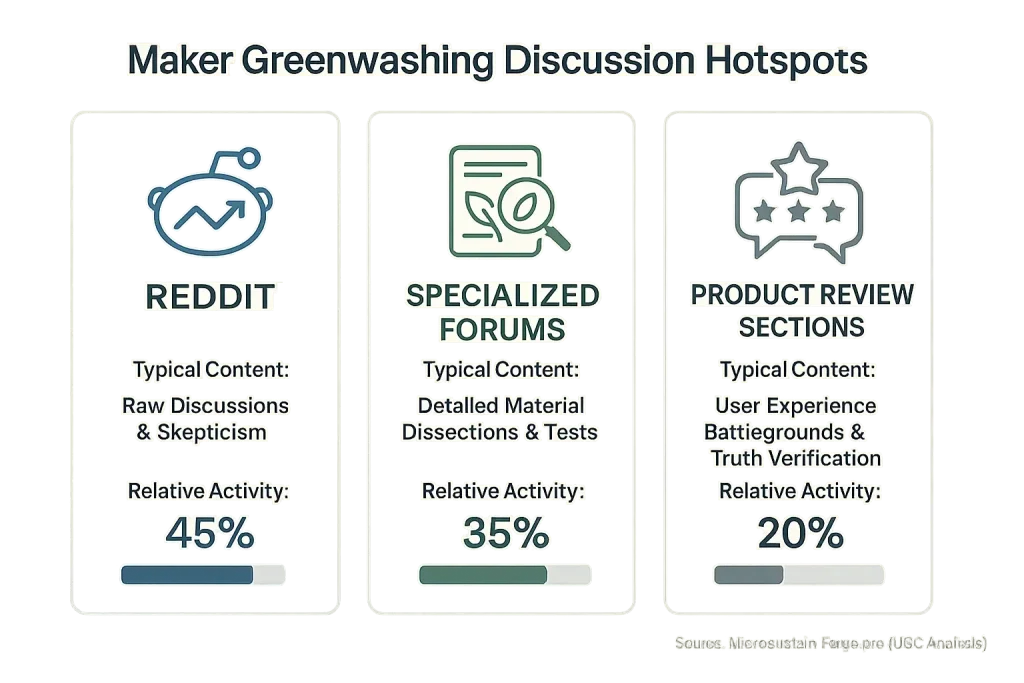
The solution often lies within shared maker experiences. MicroSustain Forge has analyzed countless discussions from woodworking forums and DIY project comments. Our UGC analysis uncovers the real reasons behind premature fading and peeling. More importantly, it reveals practical, community-tested preventative methods. This is knowledge forged from collective successes and failures. Real answers. From real makers.
This guide illuminates the path to durable eco-finishes. We explore common causes of paint failure on wood. You will learn essential surface preparation techniques specific to natural paints. Mastering proper application becomes straightforward with community-derived tips. We also cover choosing effective, compatible topcoats. Ultimately, understanding these materials and mastering their application are critical for lasting beauty.
Unmasking the Culprits: Why Eco-Paints Fade and Peel (UGC Insights)
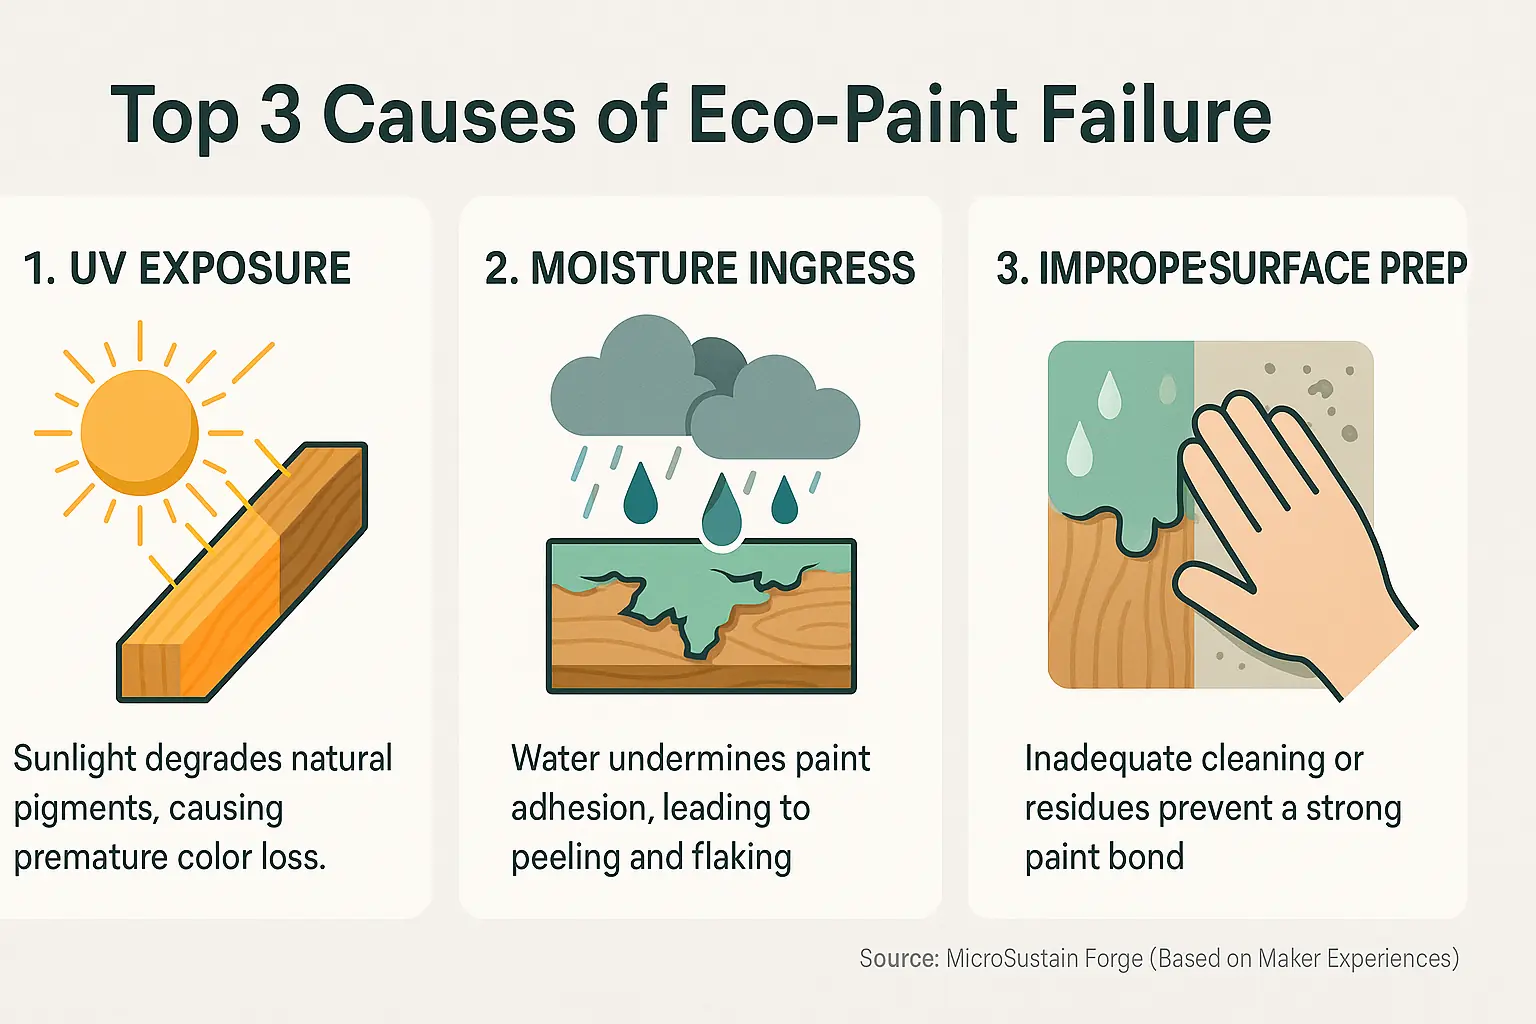
Sunlight relentlessly attacks many eco-paints. Natural pigments are often the first casualty. These pigments frequently lack robust UV protection found in their synthetic counterparts. The result? Premature fading. Picture this scenario, echoed in numerous maker forums: a vibrant, eco-painted window box. It sits on a sun-drenched sill. Weeks later, its brilliant color is a pale ghost. This rapid color loss is a common, frustrating theme in community feedback. UV exposure is a serious factor.
Moisture is another major culprit. Our deep dive into user complaints reveals it as a primary driver of peeling. Water ingress, whether from high humidity or direct contact, consistently undermines the paint's bond. Think about that outdoor bench, beautifully finished with an eco-paint. "It looked great until the first real rain," one maker reported, "then it just started flaking off!" This story is a familiar one. Water resistance can be a significant hurdle for some formulations.
Improper surface preparation is a silent adhesion assassin. Many makers discover, too late, that eco-paints often demand more meticulous prep than conventional options. They can be less forgiving of invisible enemies. What kind? Even slight oily residues or fine dust, things you might miss, can prevent a solid bond. The paint then fails to grip properly. This oversight frequently turns anticipated triumphs into peeling disappointments. Thorough cleaning isn't just advice; it's essential.
The unique material composition of some eco-paints also contributes. Certain natural binders, for instance, may offer less inherent resilience against environmental stressors compared to robust synthetic acrylics. This doesn't mean all eco-paints are fragile. But community experiences highlight that some formulations are more vulnerable to weathering. Makers find these paints sometimes struggle under prolonged exposure. The lesson from the collective? Know the paint's limits.
The Unsung Hero: Mastering Surface Preparation for Eco-Paints (Interactive Checklist)
Your Eco-Paint Prep Checklist: Don't Skip a Step!
Eco-paints demand meticulous surface preparation. This checklist prevents overlooked critical steps. Many makers discover this truth painfully. Their vibrant eco-paint job starts flaking weeks later. The culprit? Often a rushed cleaning or insufficient sanding. Even the best eco-paint fails on a poorly prepared surface. Proper prep is your secret weapon.
This checklist embodies collective maker wisdom. It distills countless hours of community troubleshooting. These steps represent what actually works for lasting eco-paint adhesion. Consider it the community’s shared blueprint for success. Re-evaluate your current prep habits against these insights. Here's a key learning from online discussions: eco-paints offer less tolerance for prep mistakes than conventional paints. Mastering preparation unlocks their true beauty and durability.
Application Mastery: Techniques for a Lasting Eco-Paint Job (Community Secrets)

Eco-friendly wood paints ask for a different touch. They are not your typical 'apply and forget' coatings. Our extensive community data mining reveals this truth clearly. Mastering specific application techniques ensures longevity. This skill unlocks a truly durable, beautiful finish on your sustainable wood projects.
Let's dive into paint specifics. Milk paint needs careful preparation. Flawless mixing is absolutely critical; say goodbye to lumps. Experienced makers consistently apply multiple thin coats for optimal coverage. Thick coats? Avoid them. Clay paints, on the other hand, demand smooth, even spreading. Resist overworking the surface. Many users find that trying to get full coverage in one thick coat with milk paint is a recipe for disaster; thin layers are your friend! This approach helps master techniques for evenness.
Your brush choice significantly impacts natural pigment paints. Natural bristle brushes often perform best. Our analysis of successful projects highlights ambient conditions. Temperature and humidity are major factors. Eco-paints generally require more drying time between coats. Patience pays. Here's a subtle tip from the workshops: slight humidity can sometimes aid the flow of certain natural paints. Too much humidity, however, quickly becomes a problem for adhesion and durability.
So, what is the core secret shared across maker communities for these paints? It's straightforward. Patience. Meticulous technique. These factors consistently lead to better results than relying on brand promises alone when you apply correctly. The 'art' of application, honed through shared maker experiences, truly elevates your eco-friendly paint job from good to great, ensuring it lasts.
The Ultimate Shield: Choosing & Applying Protective Topcoats for Eco-Paints (UGC Insights)
Eco-paints often need an ultimate shield. Protective topcoats deliver this vital defense. They extend your paint's lifespan considerably. High-traffic surfaces truly benefit from this extra layer. Outdoor projects practically demand topcoats for survival. Some eco-paints boast inherent durability. Many makers, however, discover a topcoat still enhances performance. Think of it as smart insurance for your careful work.
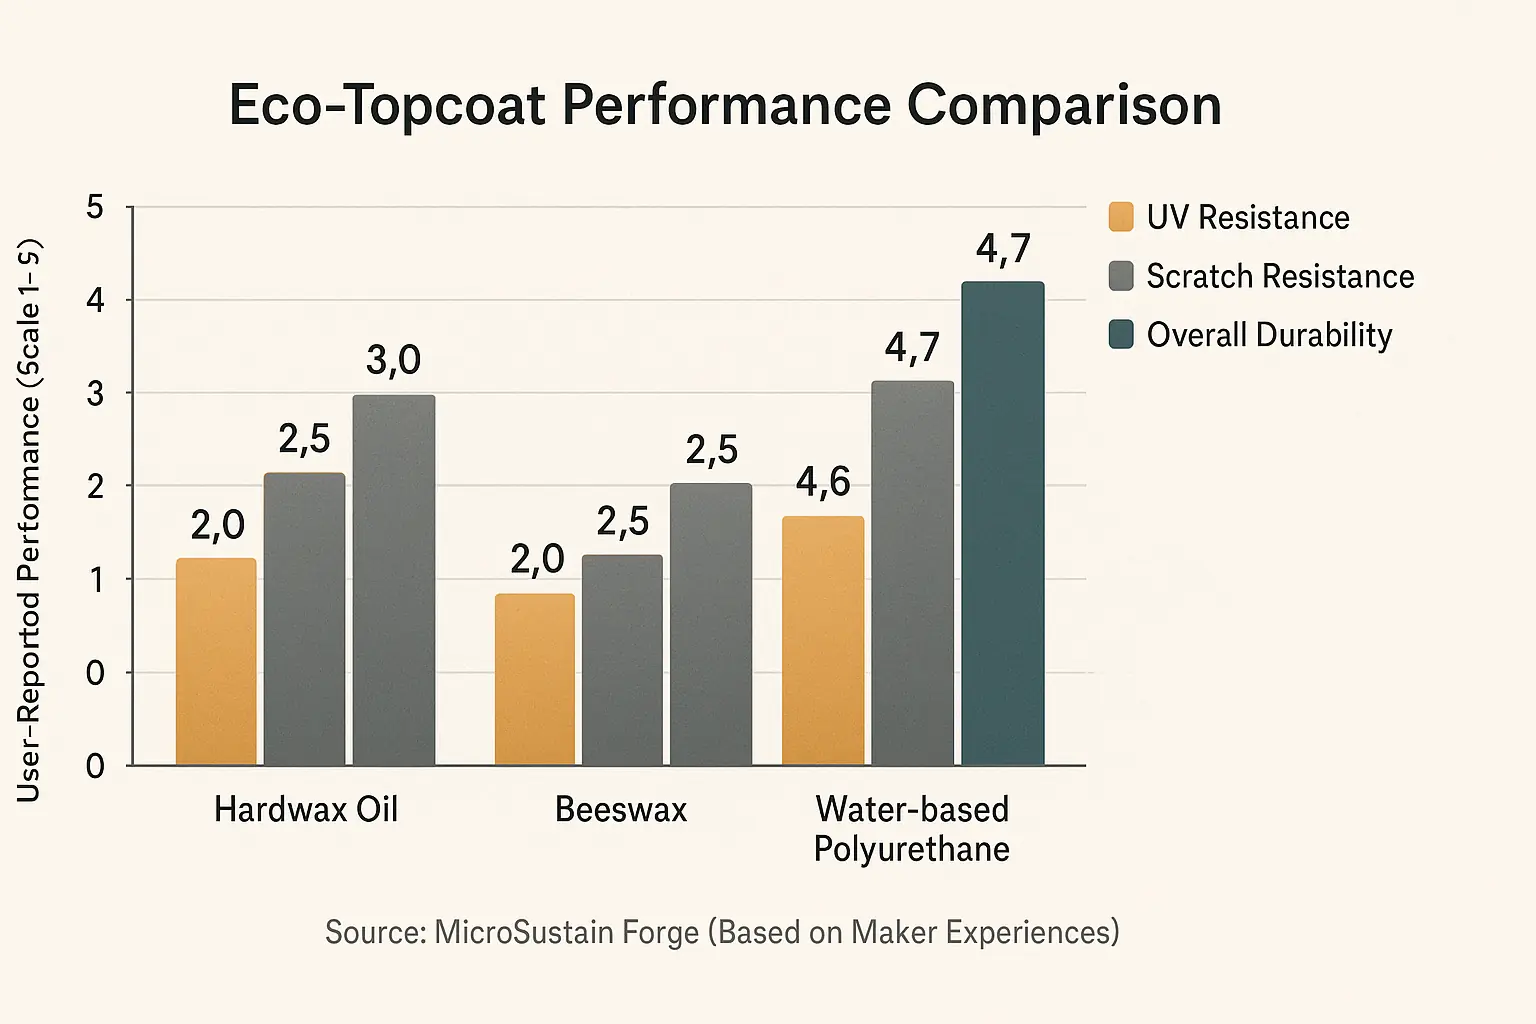
Makers face several eco-friendly topcoat choices. Natural oils and waxes offer a distinct appeal. Hardwax Oil, for example, penetrates wood deeply, nourishing it. Tung Oil builds good water resistance over time. A Beeswax finish can provide a soft, tactile sheen. Their UV protection for paint pigments, however, can be less robust. Community discussions highlight this concern for brightly colored pieces. Water-based polyurethanes generally provide better UV defense. They also offer superior abrasion resistance. The trade-off? Sometimes a less 'natural' surface appearance. Our UGC analysis indicates some makers find certain water-based polys look too glossy, while others praise their clarity and toughness over specific eco-paints.
Proper topcoat application is absolutely critical. Compatibility between your eco-paint and topcoat is paramount. Always verify this first. A small, hidden test patch prevents major disappointments. What happens otherwise? Our findings suggest some eco-paints react unexpectedly with certain topcoats, leading to peeling, poor curing, or a tacky finish. Not ideal. Apply thin, even coats for best results. Multiple thin layers outperform one thick, troublesome coat. Sufficient curing time ensures the topcoat achieves full protective properties. Rushing this step undermines durability.
Choosing the right topcoat transforms your project's outcome. Careful application then locks in that protection. This final, thoughtful step ensures a truly long-lasting, beautiful eco-paint finish. Your hard work gains robust defense. The vibrant color of your eco-paint remains protected. Your project resists daily wear and tear for years. This is wisdom forged from countless maker experiences.
Forge Lasting Beauty: Your Eco-Paint Success Story Starts Here
Eco-paint problems? Avoid them. Prevention truly is simpler than any fix. Meticulous preparation forms your project's strong foundation. Careful application then builds lasting, vibrant beauty. Strategic topcoats expertly protect your finished work. These crucial steps are not mere suggestions. This is wisdom. It's forged from countless maker trials and shared experiences. Eco wood paint longevity thrives on such powerful, community-vetted knowledge, ensuring your sustainable making efforts shine.
So, what now? Take these insights. Go forge something beautiful and enduring. We genuinely want to hear about your eco-paint successes. Did new challenges surface during your project? Tell the MicroSustain Forge community. Your experiences empower other makers. Our mission supports your sustainable journey. Together, we advance responsible creating, one stunning, lasting piece at a time.